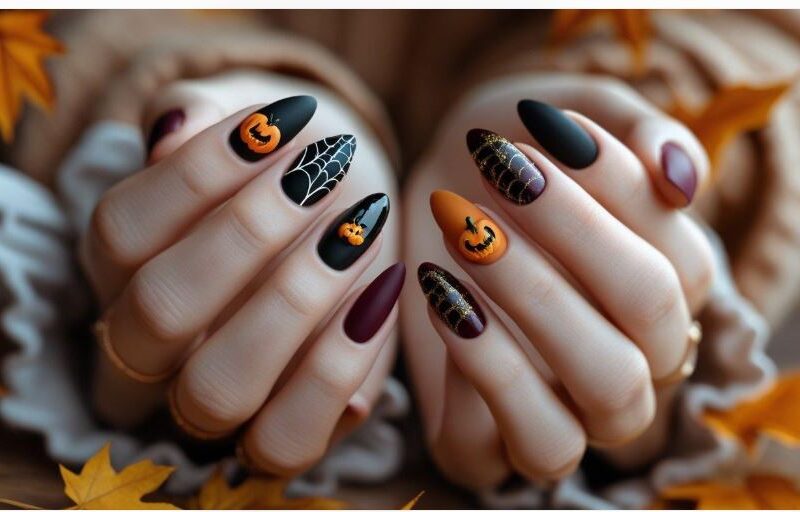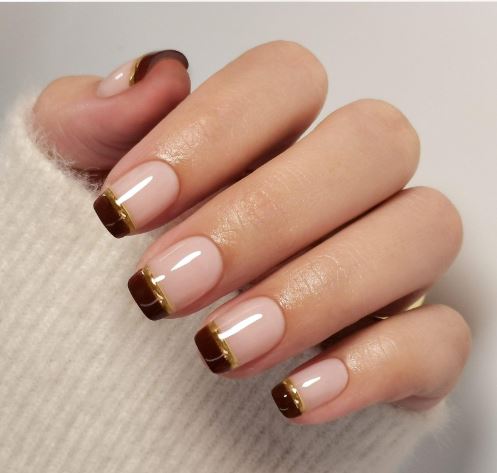
Gel nail art is one of the most exciting ways to transform a simple manicure into something beautiful, creative, and personal. Whether you love delicate nude nails, colourful French tips, dreamy marble effects, or dramatic 3D decorations, there is a gel nail design for every style and skill level.
The best part? You don’t have to be a professional nail artist to create beautiful designs. With the right tools, a little patience, and some easy-to-follow techniques, you can gradually progress from simple gel manicures to intricate nail art.
In this complete guide, we’ll explore 15 gorgeous gel nail art ideas, starting with beginner-friendly designs and working our way up to more advanced techniques. You’ll also discover helpful application tips, essential tools, and practical advice for achieving a polished, long-lasting finish.
1. Easy Gel Nail Art Ideas for Beginners
If you’re new to gel nails, begin with designs that require minimal tools and simple movements. These styles are beautiful, wearable, and perfect for building confidence.
1.1 Minimalist Nude Gel Nails

Minimalist nude gel nails are timeless, elegant, and incredibly versatile. Soft shades of beige, blush pink, milky white, and peach create a clean appearance that complements almost any outfit.
How to create the look:
- Prepare and clean your natural nails, gently shaping the edges.
- Apply a compatible gel base coat, keeping it off the skin, and cure according to the manufacturer’s instructions.
- Apply two thin layers of nude gel polish, curing each layer as directed.
- Add a tiny white dot or delicate accent using a dotting tool.
- Finish with a glossy gel top coat and cure fully.
Style tip: Choose a sheer pink shade for a natural-looking manicure or a creamy beige for a sophisticated finish.
1.2 Simple Polka Dot Gel Nails

Polka dot nails are playful, charming, and surprisingly easy to recreate. They work beautifully with pastel colours, bold combinations, or classic black-and-white designs.
Step-by-step tutorial:
- Apply your favourite base colour and cure.
- Place a small amount of contrasting gel polish on a palette.
- Dip a dotting tool into the polish.
- Gently create evenly spaced dots across each nail.
- Cure the design and seal with top coat.
For a modern twist, decorate only one or two accent nails rather than every finger.
1.3 Easy Glitter Accent Nails

Glitter accent nails offer an effortless way to add sparkle without overwhelming your manicure.
Start with a neutral base on most fingers, then apply a fine glitter gel polish to one or two nails. Champagne, rose gold, silver, and soft holographic glitter are especially beautiful choices.
For a more subtle effect, concentrate the glitter near the cuticle or tip and gradually fade it into the base colour.
2. Trendy Gel Nail Art Ideas for Intermediate Skills
Once you’re comfortable applying gel polish, experiment with techniques that require greater precision, colour blending, and decorative details.
2.1 Colourful French Tip Gel Nails

The traditional French manicure has evolved into a colourful, creative nail art favourite.
Instead of classic white tips, try lavender, mint green, coral, sky blue, or even a different colour on every finger.
How to achieve perfect French tips:
- Apply a sheer nude or pink gel base and cure.
- Use a fine nail art brush to outline the curved tip.
- Carefully fill the tip with your chosen colour.
- Refine the smile line before curing.
- Cure and finish with a protective top coat.
Pro tip: Begin with wider French tips if you’re still developing brush control. Thin micro-French tips require a steadier hand.
2.2 Soft Ombre Gel Nails

Ombre gel nails feature a smooth transition between two or more colours, creating a soft, dreamy finish.
Popular combinations include baby pink fading into white, lavender blending into blue, and nude transitioning into peach.
Step-by-step tutorial:
- Apply and cure your base colour.
- Place small amounts of two compatible gel colours onto a palette.
- Use an appropriate ombre brush to blend the colours on the nail.
- Keep each layer thin and cure as instructed.
- Repeat with thin layers until the gradient looks smooth.
- Finish with glossy top coat.
Avoid applying thick layers, as they can cure unevenly and affect the final result.
2.3 Floral Gel Nail Art

Floral gel nails are ideal for spring, summer, weddings, and romantic occasions. Tiny daisies, delicate roses, and simple botanical details can instantly make a manicure feel special.
To create an easy daisy, use a dotting tool to place five small white petals in a circle. Add a yellow dot in the centre, cure the design, and apply top coat.
Once you’ve mastered simple flowers, experiment with overlapping petals, fine green leaves, and miniature bouquets.
2.4 Abstract Swirl Gel Nails

Abstract swirl nails are perfect for anyone who loves contemporary, artistic manicures.
Unlike symmetrical designs, swirls look beautiful when each nail features a slightly different pattern.
Start with a neutral gel base and use a fine liner brush to paint curved lines in two or three complementary colours. Leave negative space between the lines for a fresh, modern finish.
For an especially stylish combination, try chocolate brown, cream, and pale pink.
3. Advanced Gel Nail Art Ideas for a Professional Finish
Ready for a bigger challenge? These techniques require more patience, specialised products, and precise application.
3.1 Elegant Marble Gel Nails

Marble gel nails imitate the natural patterns found in polished stone. The result feels luxurious, artistic, and surprisingly versatile.
How to create marble nails:
- Apply and cure a white or pale nude gel base.
- Add thin, irregular grey lines using a fine brush.
- Soften the lines with a compatible blending gel or suitable brush technique.
- Add subtle secondary veins for depth.
- Cure each stage as required.
- Finish with a glossy top coat.
For an elevated design, add a few delicate gold accents between the marble veins.
3.2 Chrome Mirror Gel Nails

Chrome gel nails are known for their striking metallic shine. Depending on the powder and base colour, they can appear silver, golden, pearlescent, or iridescent.
To create a chrome effect, apply a compatible gel colour, cure, then use a chrome-compatible no-wipe top coat according to its product instructions. Rub the chrome pigment over the prepared surface with an applicator and seal it carefully.
Chrome looks particularly beautiful on almond, square, and stiletto nail shapes.
3.3 3D Floral Gel Nail Art

Three-dimensional floral nail art adds texture and dimension to a manicure. Raised petals, sculpted flowers, and pearl accents create an elegant statement look.
Specialised sculpting gel is used to build individual petals, which are shaped and cured according to the product instructions.
This technique is best learned through professional training or supervised practice because thicker gel structures require correct product selection and complete curing.
3.4 Cat-Eye Magnetic Gel Nails

Cat-eye gel nails create a glowing, dimensional effect using magnetic particles suspended in specialised gel polish.
After applying the magnetic gel, hold the appropriate nail magnet near the uncured surface without touching it. Move the magnet to create a luminous stripe, curved glow, or velvet-like effect, then cure according to the manufacturer’s instructions.
Deep emerald, burgundy, sapphire, and midnight purple are particularly striking shades.
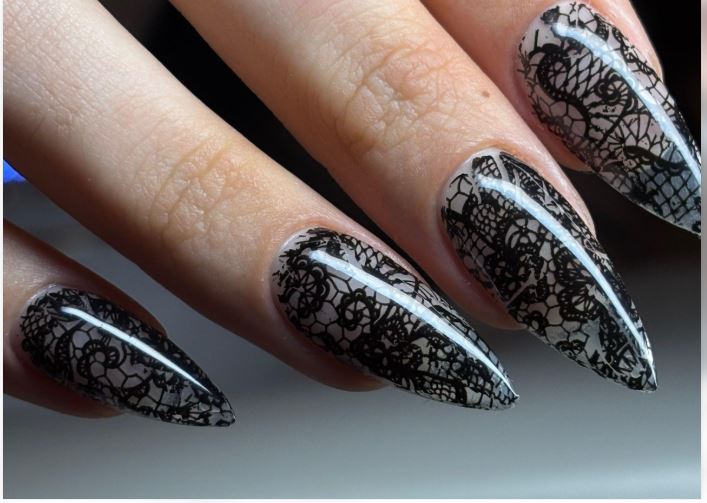
3.5 Intricate Lace Gel Nail Art

Lace-inspired gel nails combine fine lines, delicate loops, and intricate patterns to create a sophisticated finish.
A sheer nude base with black lace detailing produces a dramatic effect, while white lace over soft pink feels romantic and bridal.
Use a very fine liner brush and build the pattern in small sections, curing as needed to preserve the details.
4. More Creative Gel Nail Art Ideas Worth Trying
4.1 Tortoiseshell Gel Nails

Tortoiseshell nails combine translucent amber, caramel, chocolate brown, and black tones in layered, irregular patterns. The technique creates a warm, glossy appearance that pairs beautifully with autumn wardrobes.
4.2 Celestial Star and Moon Nails

Celestial nail art features tiny stars, crescent moons, and shimmering accents. Navy blue, black, and deep purple bases create a dramatic night-sky effect, while nude backgrounds offer a softer interpretation.
4.3 Pearl and Gemstone Gel Nails

Pearl and gemstone accents bring a glamorous touch to gel manicures. Tiny decorative pearls, rhinestones, and metallic details can transform a simple nude manicure into a statement design.
Use a nail-specific embellishment adhesive or suitable securing gel, and follow the product instructions for proper attachment.
4.4 Geometric Colour-Block Gel Nails

Geometric nail art combines straight lines, contrasting colours, triangles, and negative space.
Try pairing cream with cobalt blue, pastel pink with burgundy, or orange with soft beige. Clean edges are essential, so work slowly with a fine brush and cure each section as needed.
5. Essential Tools for Beautiful Gel Nail Art
Before creating your favourite designs, gather the right equipment. Having everything prepared makes the process smoother and helps you achieve more consistent results.

| Essential tool | Purpose |
|---|---|
| Gel base coat | Helps gel polish adhere |
| Coloured gel polish | Creates the base and artwork |
| Gel top coat | Protects and finishes the manicure |
| Compatible UV/LED lamp | Cures gel products |
| Fine liner brushes | Creates detailed patterns |
| Dotting tools | Makes flowers, dots, and hearts |
| Nail file and buffer | Shapes and prepares nails |
| Lint-free wipes | Removes residue where required |
| Nail art decorations | Adds pearls, glitter, and rhinestones |
6. How to Make Gel Nail Art Last Longer
A beautiful manicure should look polished beyond the first day. Proper preparation and aftercare can help reduce lifting, peeling, and premature chipping.
Prepare Your Nails Carefully
Begin with clean, dry nails. Shape them gently, remove loose debris, and avoid aggressively cutting or scraping the cuticles.
Apply Thin Layers
Thin gel layers are easier to control and more likely to cure correctly than thick applications. Always follow the manufacturer’s recommended layer thickness and curing instructions.
Keep Gel Away From Your Skin
Uncured gel should not touch your skin or cuticles. Repeated skin exposure can cause acrylate allergies. If gel gets onto your skin, remove it completely before curing.
Use a Compatible Curing Lamp
Not every lamp cures every gel formula properly. Choose a lamp recommended by the gel manufacturer and follow its curing times. A surface that feels hard is not necessarily fully cured.
Protect Your Manicure
Wear gloves when using cleaning products, moisturise your hands regularly, and avoid using your nails to open packages or scrape surfaces.
7. Common Gel Nail Art Mistakes to Avoid
Beginners sometimes struggle with uneven lines, thick polish, or decorations that detach too quickly. Most of these issues improve with careful technique and practice.
- Applying thick gel layers: This can lead to incomplete curing, wrinkling, or peeling.
- Skipping nail preparation: Oil and debris can interfere with adhesion.
- Using incompatible products: Different gel systems may require specific base coats, top coats, and lamps.
- Overworking detailed designs: Practise complicated artwork on nail tips before applying it to natural nails.
- Peeling off gel polish: This can remove layers of the natural nail. Use the manufacturer’s recommended removal method, or visit a professional.
If you experience itching, swelling, blistering, or persistent irritation, stop using the products and seek medical advice.
8. Frequently Asked Questions About Gel Nail Art
How long does gel nail art last?
A professionally applied gel manicure often lasts around two to three weeks, depending on nail growth, product quality, application, and daily activities.
Can beginners do gel nail art at home?
Yes, beginners can learn simple designs such as dots, flowers, and French tips. However, gel systems require correct curing and careful handling to reduce the risk of skin allergies. Practising with regular nail polish or on artificial nail tips is a good way to develop skills first.
What gel nail designs are easiest for beginners?
Minimalist nude nails, polka dots, glitter accents, and simple floral designs are excellent starting points because they require relatively little precision.
Which gel nail designs look most luxurious?
Chrome finishes, marble effects, delicate French tips, pearl accents, and sculpted floral designs can create a sophisticated, salon-inspired appearance.
Can gel nail art damage natural nails?
Improper preparation, over-filing, peeling off gel, or aggressive removal can damage natural nails. Correct application and gentle removal help minimise damage.
Final Thoughts: Find Your Perfect Gel Nail Art Style
Gel nail art is a wonderful way to express creativity, explore different colours, and experiment with beautiful designs.
Start with minimalist nude nails, simple dots, or glitter accents if you’re a beginner. As your confidence grows, move on to colourful French tips, ombre effects, and floral patterns. For a more dramatic manicure, explore marble designs, magnetic cat-eye finishes, chrome effects, and dimensional decorations.
The secret to beautiful gel nail art isn’t creating the most complicated design. It’s choosing a style you love, developing your technique, and paying attention to every detail.
With practice and proper product safety, even the simplest manicure can become something special.